
how to make a diy wedding backdrop?

To make a DIY wedding backdrop, you can start by choosing a theme or color scheme that matches your wedding decor. Next, gather materials such as fabric, curtains, ribbons, or paper flowers that align with your chosen theme. Measure and cut the fabric or curtains to the desired size and attach them to a sturdy frame or backdrop stand using clips or adhesive. You can also add additional elements like fairy lights, greenery, or personalized signage to enhance the backdrop. Finally, set up the backdrop at your wedding venue and make any necessary adjustments to ensure it looks perfect for your special day.
1、 Fabric and Drapery Techniques for DIY Wedding Backdrops
How to Make a DIY Wedding Backdrop: Fabric and Drapery Techniques for DIY Wedding Backdrops
Creating a stunning backdrop for your wedding is a great way to add a touch of elegance and personalization to your special day. One popular option for a DIY wedding backdrop is using fabric and drapery techniques. This allows you to create a beautiful and unique backdrop that matches your wedding theme and style. Here are some steps to help you create a DIY wedding backdrop using fabric and drapery techniques.
1. Choose the Right Fabric: Start by selecting the fabric that matches your wedding theme and color scheme. Consider using lightweight fabrics like chiffon, organza, or tulle for an ethereal and romantic look. You can also opt for heavier fabrics like velvet or satin for a more luxurious feel.
2. Measure and Cut the Fabric: Measure the dimensions of the area where you want to hang the backdrop and cut the fabric accordingly. Make sure to leave some extra fabric for draping and gathering.
3. Install a Support Structure: Depending on the venue, you may need to install a support structure to hang the fabric. This can be done using PVC pipes, wooden dowels, or a freestanding backdrop frame. Ensure that the structure is sturdy and secure.
4. Attach the Fabric: Use clips, hooks, or ties to attach the fabric to the support structure. Start by securing the top of the fabric and then work your way down, creating pleats or gathers as desired. Experiment with different draping techniques to achieve the desired look.
5. Add Decorative Elements: Enhance the backdrop by adding decorative elements such as flowers, fairy lights, or ribbons. These embellishments can be attached to the fabric using glue, pins, or thread.
6. Test and Adjust: Once the fabric is attached, step back and assess the overall look of the backdrop. Make any necessary adjustments to ensure that the fabric is evenly distributed and the draping is aesthetically pleasing.
7. Consider the Latest Trends: To add a modern touch to your DIY wedding backdrop, consider incorporating the latest trends. For example, you could use ombré fabric for a gradient effect or incorporate geometric patterns for a contemporary look.
Remember, the key to creating a stunning DIY wedding backdrop is to be creative and experiment with different fabric and drapery techniques. Don't be afraid to think outside the box and add your personal touch to make it truly unique. With a little time and effort, you can create a beautiful backdrop that will leave a lasting impression on your guests and make your wedding day even more memorable.
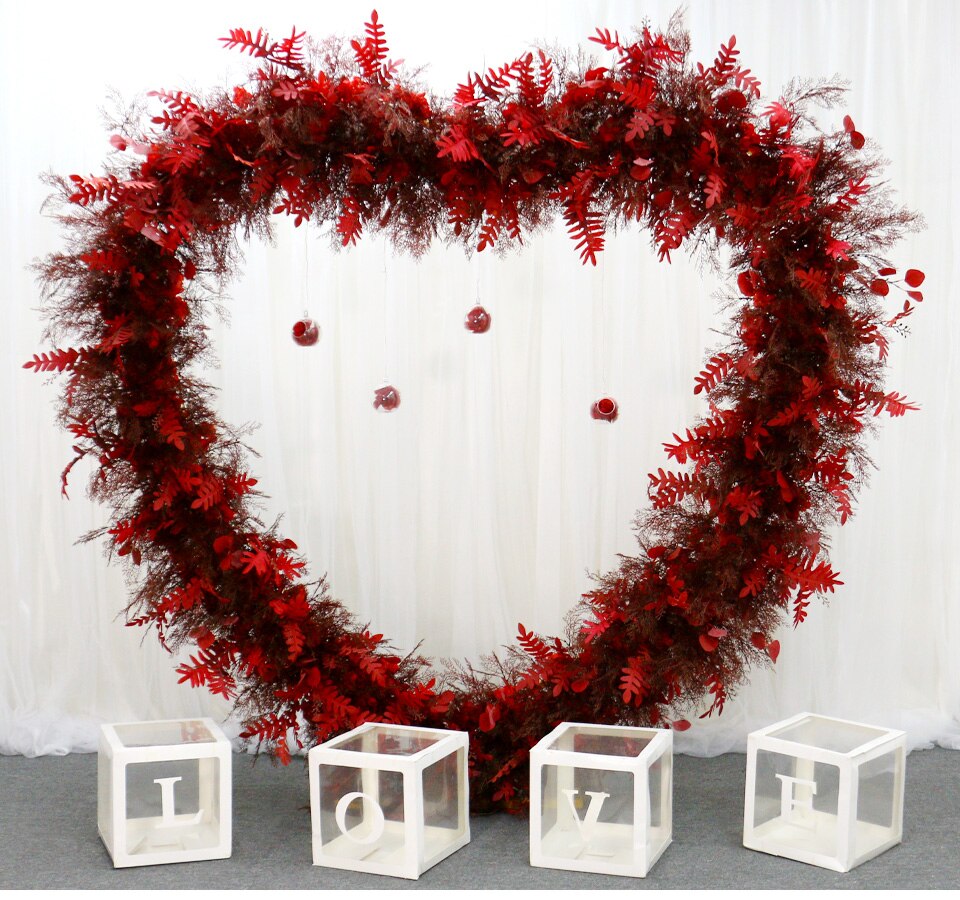
2、 Floral and Greenery Designs for DIY Wedding Backdrops
How to Make a DIY Wedding Backdrop: Floral and Greenery Designs
Creating a stunning backdrop for your wedding can be a memorable and personal touch to your special day. One popular trend that continues to captivate couples is incorporating floral and greenery designs into their DIY wedding backdrops. This natural and romantic aesthetic adds a touch of elegance and beauty to any venue. Here's a step-by-step guide on how to create your own floral and greenery backdrop:
1. Choose your materials: Start by selecting the type of flowers and greenery you want to use. Consider the color scheme and theme of your wedding to ensure a cohesive look. Popular choices include roses, peonies, eucalyptus, and ivy.
2. Create a frame: Build a sturdy frame using PVC pipes or wooden dowels. Measure the dimensions of your desired backdrop and cut the pipes accordingly. Connect the pieces using connectors or zip ties, ensuring stability.
3. Attach a backdrop fabric: Choose a fabric that complements your wedding theme and attach it to the frame using clips or adhesive. Opt for a sheer or lightweight fabric to allow the flowers and greenery to shine through.
4. Arrange the greenery: Start by attaching the greenery to the top of the frame, allowing it to cascade down. Secure the stems using floral wire or zip ties. Layer different types of greenery to add depth and texture.
5. Add the flowers: Once the greenery is in place, carefully insert the flowers into the frame. Use floral wire or hot glue to secure them. Create a balanced arrangement by distributing the flowers evenly throughout the backdrop.
6. Personalize with additional elements: Consider adding personal touches such as hanging picture frames, fairy lights, or personalized signage to make the backdrop uniquely yours.
7. Set up the backdrop: Once your DIY wedding backdrop is complete, transport it to your venue and set it up according to your desired location. Ensure it is securely fastened and stable.
Remember, the key to a successful DIY wedding backdrop is planning and preparation. Experiment with different flower and greenery combinations to find the perfect look for your special day. With a little creativity and effort, you can create a breathtaking backdrop that will leave a lasting impression on your guests.
3、 Lighting and Projection Ideas for DIY Wedding Backdrops
How to Make a DIY Wedding Backdrop: Lighting and Projection Ideas
Creating a stunning backdrop for your wedding is essential to set the mood and create a memorable atmosphere. One popular trend in recent years is the use of lighting and projection to enhance the overall aesthetic of the backdrop. Here are some ideas on how to incorporate lighting and projection into your DIY wedding backdrop:
1. Fairy Lights: Fairy lights are a versatile and affordable option that can instantly transform any space. You can hang them in cascading patterns, drape them across a wooden frame, or create a curtain effect by attaching them to a backdrop stand. Choose warm white lights for a romantic ambiance or go for colorful lights to match your wedding theme.
2. Projected Patterns: Projecting patterns onto a backdrop can add a unique and personalized touch to your wedding. You can use a projector to display intricate designs, such as floral patterns or geometric shapes, onto a plain backdrop. This can be done using a custom-made stencil or by using pre-designed projection templates available online.
3. Monogram Projection: Another popular trend is projecting the couple's monogram or initials onto the backdrop. This can be achieved by creating a custom monogram design and projecting it onto a plain backdrop using a gobo projector. It adds a personal touch and serves as a beautiful focal point for the wedding ceremony or reception.
4. Uplighting: Uplighting involves placing lights at the base of the backdrop to create a dramatic effect. You can use colored LED lights to match your wedding theme or go for warm white lights for an elegant look. Uplighting can highlight the texture and details of the backdrop, making it visually appealing.
5. Candlelight: For a romantic and intimate ambiance, consider incorporating candlelight into your DIY wedding backdrop. You can use candle lanterns, votive candles, or even LED candles to create a soft and warm glow. This works particularly well for outdoor weddings or rustic-themed ceremonies.
In conclusion, incorporating lighting and projection into your DIY wedding backdrop can elevate the overall look and feel of your special day. Whether you choose fairy lights, projected patterns, monogram projection, uplighting, or candlelight, these ideas will help create a stunning backdrop that reflects your personal style and adds a touch of magic to your wedding celebration.
4、 Macrame and Bohemian Styles for DIY Wedding Backdrops
How to Make a DIY Wedding Backdrop: Macrame and Bohemian Styles
Creating a DIY wedding backdrop adds a personal touch to your special day and allows you to showcase your creativity. One popular trend in wedding decor is the use of macrame and bohemian styles, which bring a unique and whimsical vibe to the backdrop. Here's a step-by-step guide on how to make a macrame and bohemian-inspired DIY wedding backdrop.
1. Gather your materials: Start by collecting the necessary supplies, including a wooden dowel or copper pipe, macrame cord, various types of yarn, feathers, beads, and artificial flowers. Choose colors that match your wedding theme.
2. Prepare the base: Attach the wooden dowel or copper pipe securely to a wall or frame. Ensure it is at a height that suits your needs.
3. Create the macrame design: Begin by making a series of macrame knots using the cord. You can find various macrame knot tutorials online to guide you. Experiment with different knot patterns to add texture and visual interest.
4. Add yarn and other embellishments: Incorporate different types and lengths of yarn into the macrame design. You can also attach feathers, beads, and artificial flowers to enhance the bohemian aesthetic.
5. Customize the backdrop: Consider adding personal touches such as hanging photos, handwritten quotes, or small trinkets that hold sentimental value.
6. Hang and adjust: Once you're satisfied with the design, carefully hang the backdrop at your desired location. Make any necessary adjustments to ensure it is level and visually appealing.
The macrame and bohemian style DIY wedding backdrop offers a romantic and free-spirited ambiance, perfect for couples looking to create a boho-chic atmosphere on their special day. Remember to personalize the backdrop to reflect your unique love story and wedding theme.


Leave your comment